This is how the underwater photos were taken
I work with two carbon housings from BS Kinetics because they are reliable and can do everything I need them to do when taking underwater shots. Depending on the lens, you need to put "ports" on the housing (bayonet lock), which have different front windows. The stronger the wide-angle lens, the more the front window of the port needs to be curved.
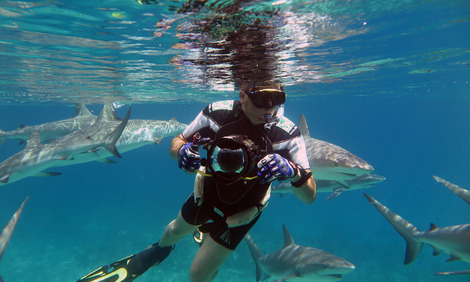
The shallow water shots were taken with a Canon EOS 7D and a Tokina Fisheye zoom 10-17 mm without a flash. Since the colours still look natural in depths of up to 5 m, no flash is necessary.
For these shots I put the ISO setting to 1000, then the camera on P (program automatic), but with a minus correction for the exposure of -0.33 eV to prevent overexposure. Automatic program selections tend to overexpose underwater shots. With these settings and lighting conditions, the camera sets the aperture to 11 and the exposure time to 1/320 sec. The sharks sometimes move quite fast and an even shorter exposure time would have been better. But then you need to set the ISO value (light sensitivity) even higher, which would lead to more noise in the images.
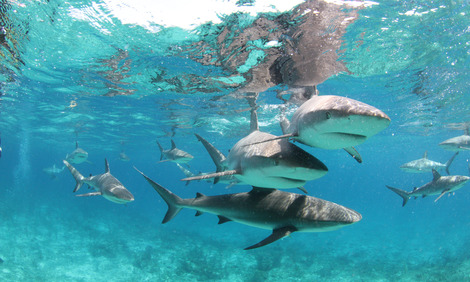
With the same camera settings you can take pictures of corals and fish when snorkelling. I reduced the ISO value to 800 and the camera set the aperture to 8 and the time to 1/840 sec. You will notice that the image already has a yellow tint at a depth of 2 m.
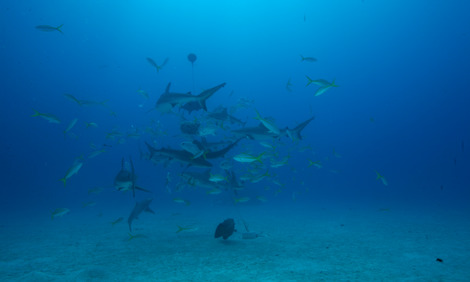
Most shots were taken at depths of 12-16 m. The clear water means there is still enough light, but from a depth of 8 m the red colour has already become absorbed and only blue tones and a little yellow remain. This picture was taken without a flash.
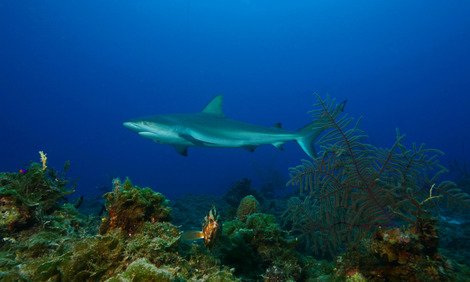
This photo shows colours despite the depth. That's only possible with a flash. The further the flash is away from the lens, the fewer floating particles in the water are flashed. In order to have low image noise, the lowest possible ISO value is set (here 200). Then, an exposure time is selected that is appropriate to the situation. I chose 1/80 sec because the sharks weren’t moving very fast. Then comes the real work: finding the right aperture so that the background shows a nice blue. If the aperture is too wide open (e.g. 4.0), the water becomes too bright.
You either need the some experience or the will to experiment here. Fortunately, with digital cameras, the result can be checked immediately in the display. The second picture was taken with flash and the less open aperture 10.
As a rule of thumb it’s better to take pictures a bit too dark than too bright. Brightness can be enhanced later with the simplest image editing programs. A too bright picture however cannot be processed once the bright sections have lost their structure (e.g. wrinkles in the white shirt).
With increasing depth you'll need to keep opening the aperture to create a nice blue background. You easily forget that when diving or ascending and wonder about the pictures being too light or too dark. ALWAYS check every image on the display immediately. Strictly speaking, you only need to adjust the aperture to the underwater depth and carry out a negative compensation of the flash for reflective objects (silvery mackerel). You can set everything else in advance on land when you have more time. But it’s also really important you know your camera very well. If you’re too busy sorting out your features and modes under water, you’ll miss the beauty of the underwater world...